This is a guide on how to install and activate EAS Solution into Shopware 6 store
Environment: Shopware 6
Requirements: EAS registration. If you are not registered, you can register at easproject.com/reg
Free of charge installation service: EAS offers free of charge installation service. If you choose to integrate EAS into your Shopware 6 store yourself, follow the steps below.
This document does not contain information on setting/adjusting tax settings in your Shopware 6 store. Please, check the EAS knowledge base here.
Before installation
Before installing the EAS EU and UK compliance extension, it's essential to be registered with EAS. If you are not registered, finalise the registration at https://easproject.com/reg
Once your registration is confirmed and you receive access credentials to the EAS dashboard, you'll gain access to the necessary key pair for the EAS extension within the dashboard.
To integrate the EAS EU Compliance extension into your Shopware 6 store, please proceed by downloading the installer
Download EAS Installer for Shopware 6
Installation
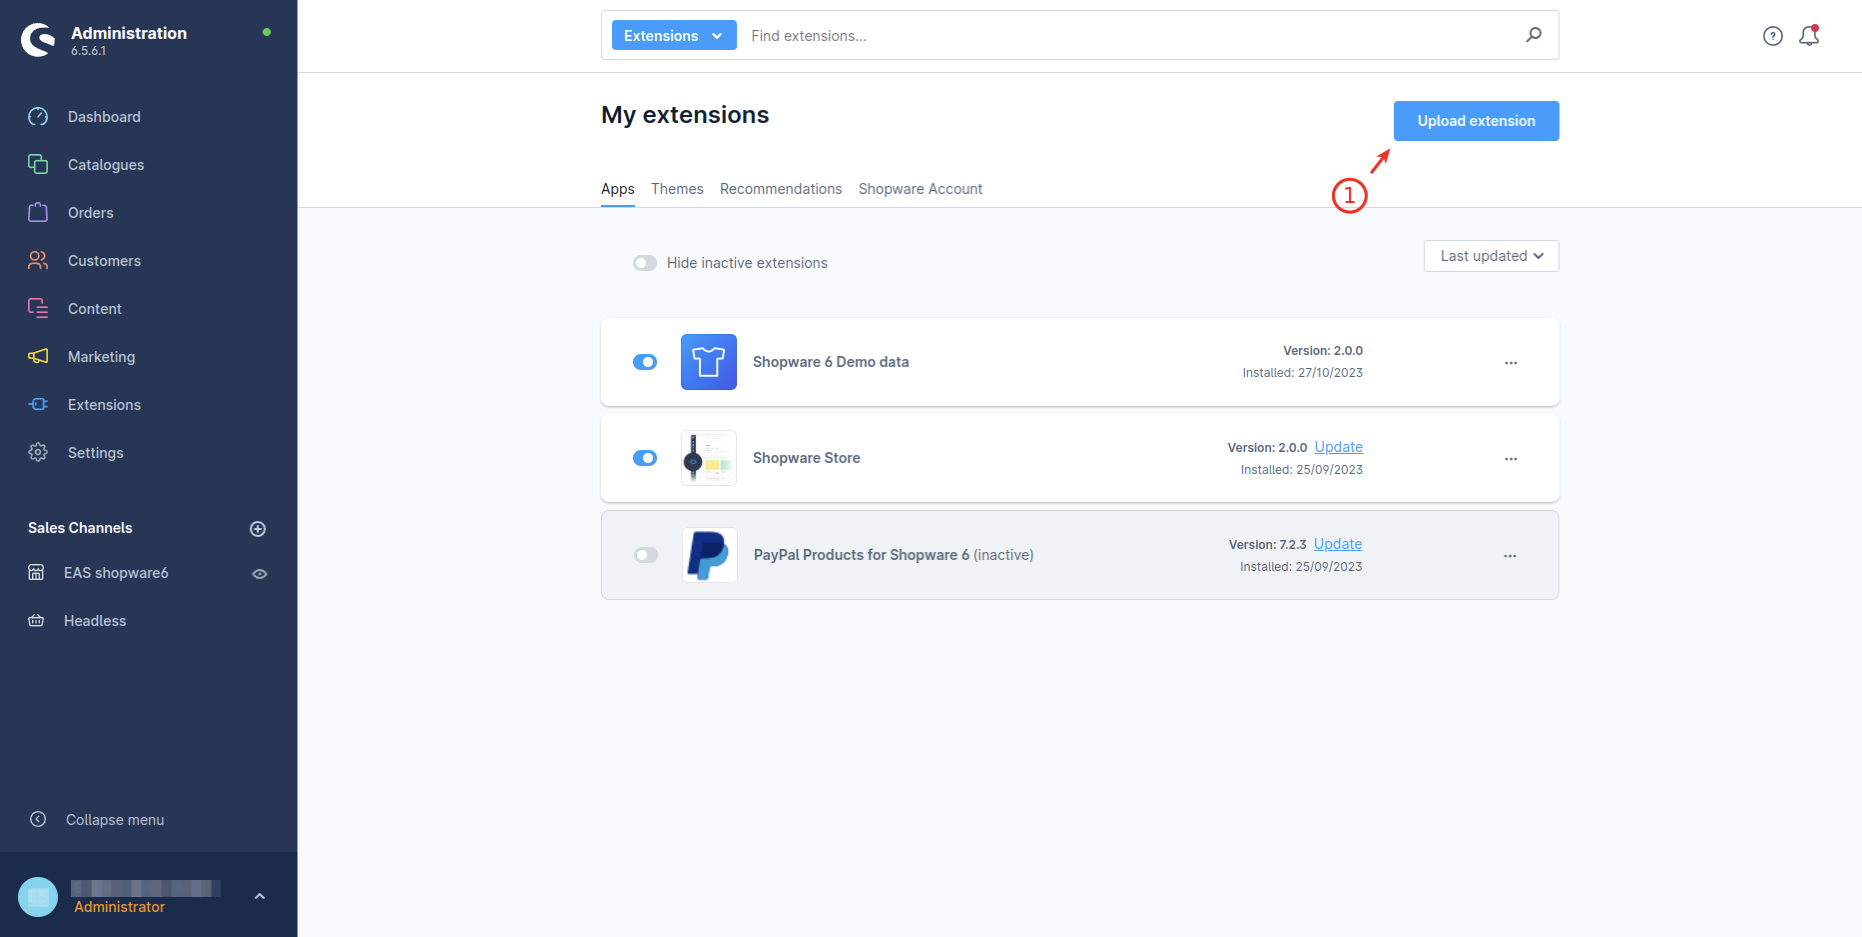
- Go to the Admin panel of your Shopware store. Then go to the section: Extensions > My extensions
- Click on the "Upload extension" button and select the previously downloaded EAS Installer ZIP-file.

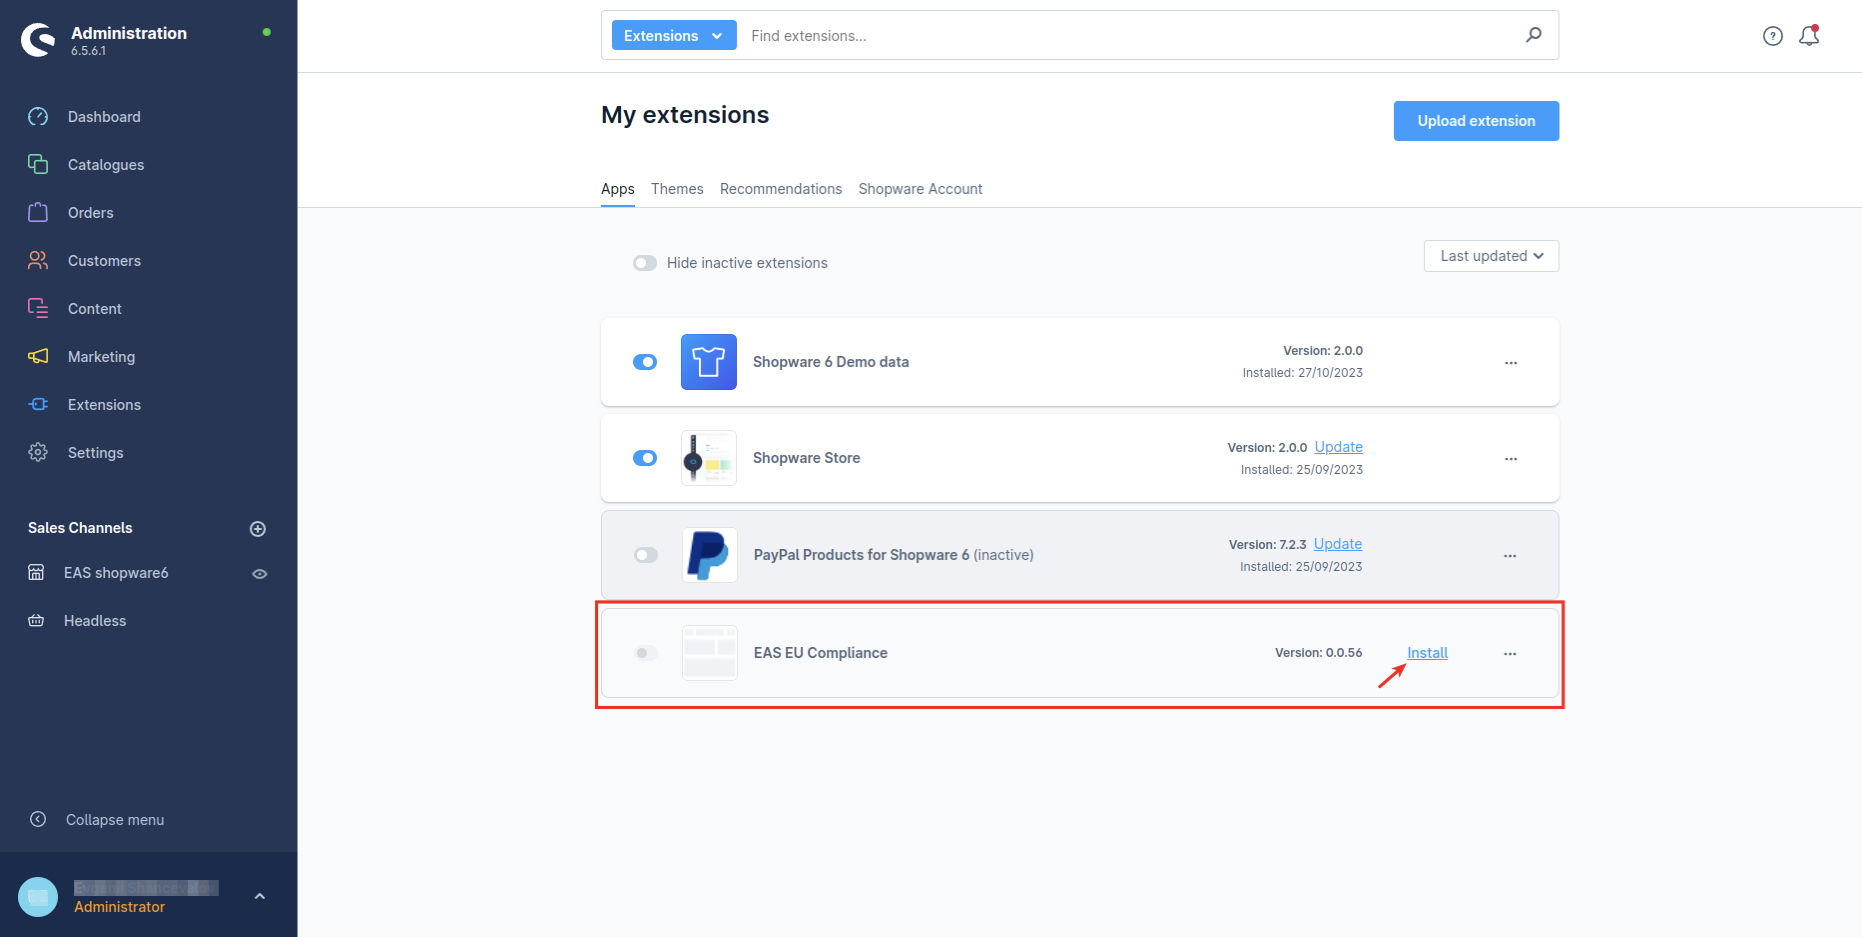
- After successful Upload, the extension will be displayed in the list of available extensions. For further installation you need to click on the "Install" button

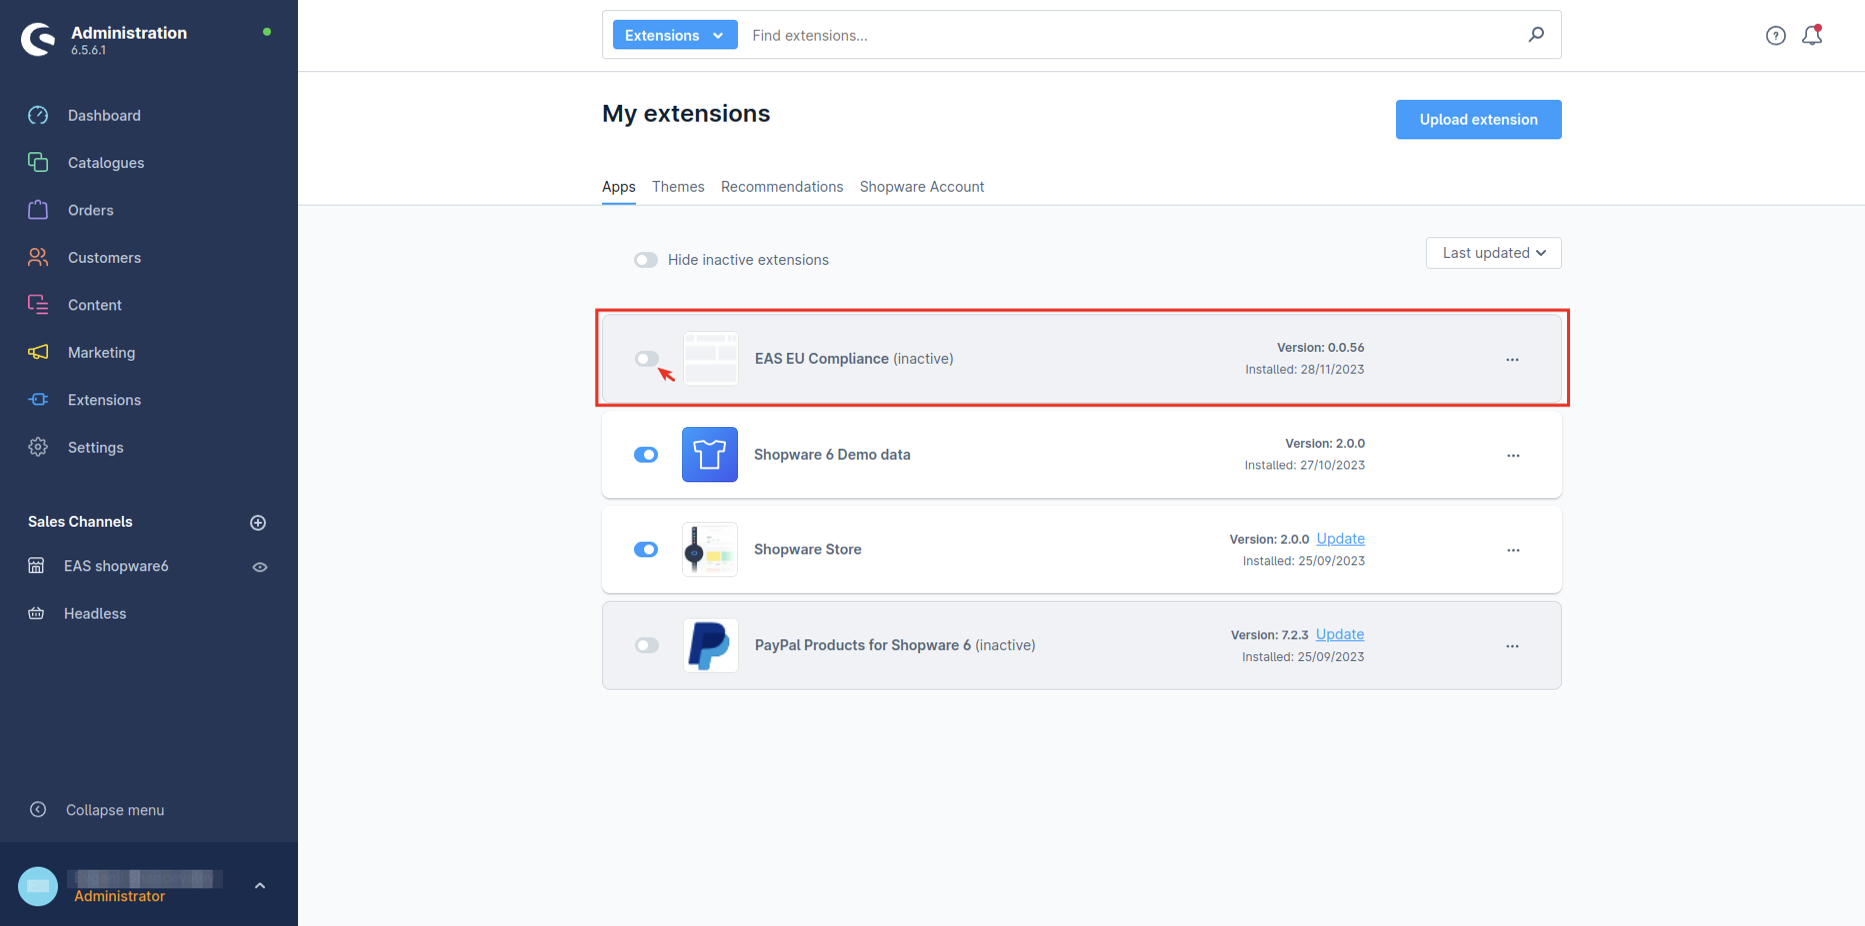
- After successful installation, you need to activate the extension which is done by clicking the status switch:

- Once the EAS extension is activated, it can be configured for integration to the EAS Dashboard.
EAS Extension configuration
Please note that in this section you will need the authorisation keys you received after the EAS registration. The keys can be found on EAS Dashboard.
If you haven’t registered, please register at https://easproject.com/reg
If you have already registered but have not received EAS Dashboard access, please reach us via Chat, or contact us at support@easproject.com.
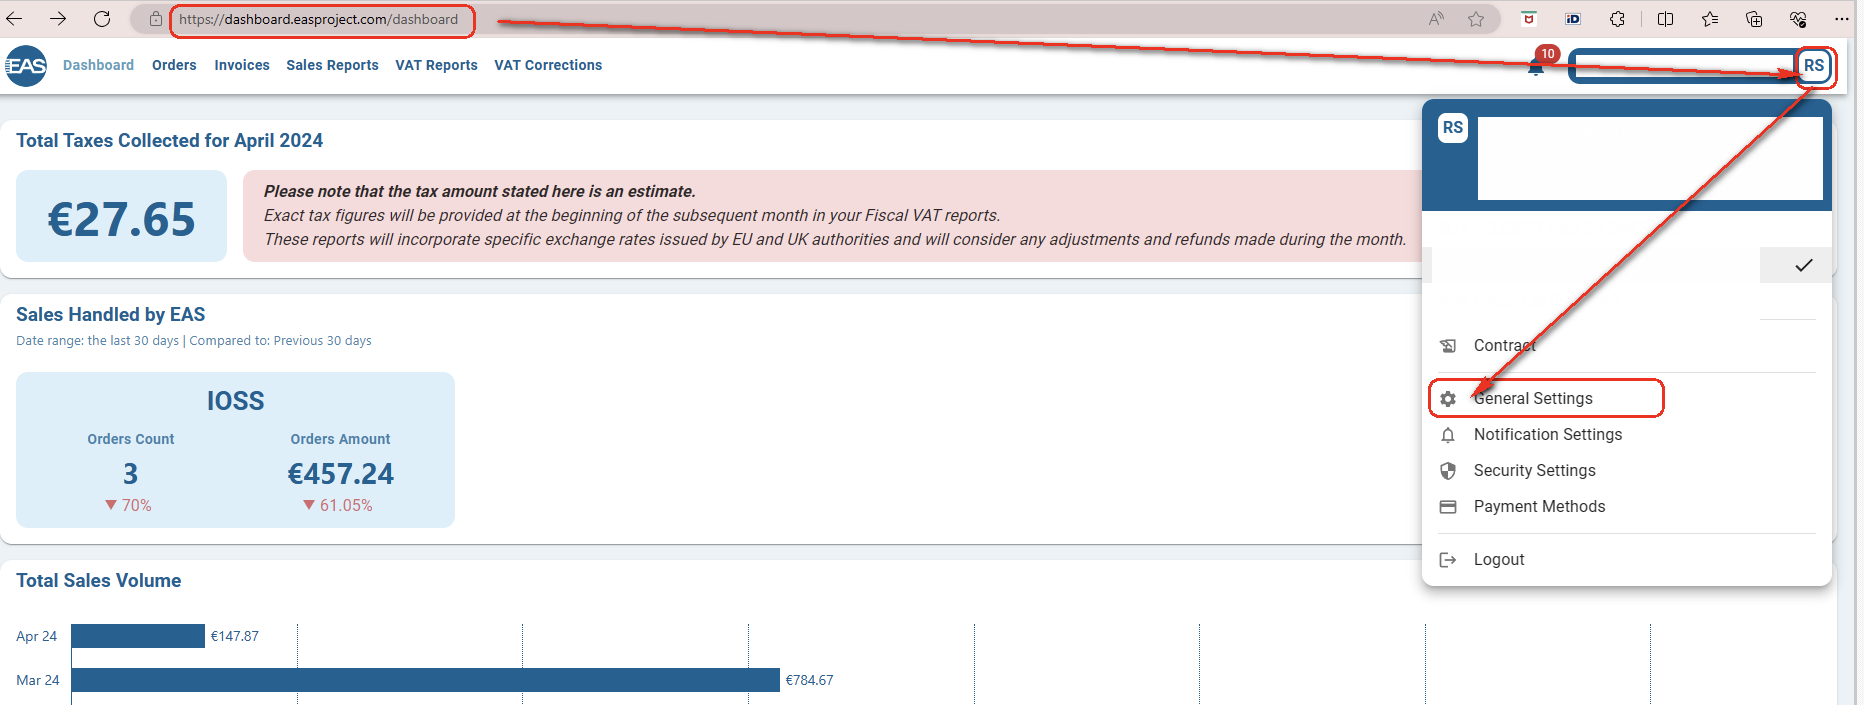
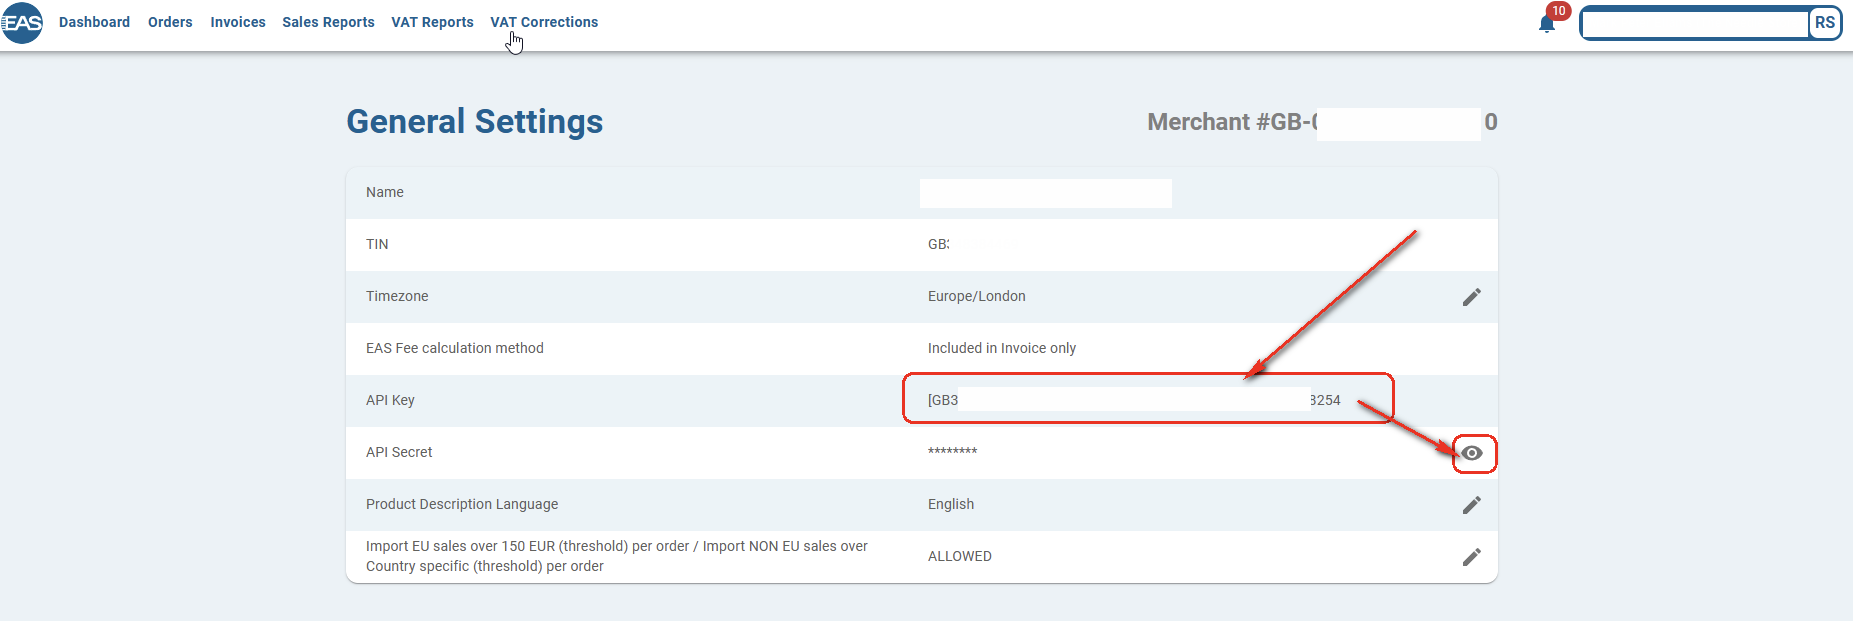
- Login to EAS Dashboard (dashboard.easproject.com)
- Go to Menu (initials on top right corner) and select General Settings

- Copy your API Key and API Secret. You have to click the Eye Icon to see the API Secret.

-
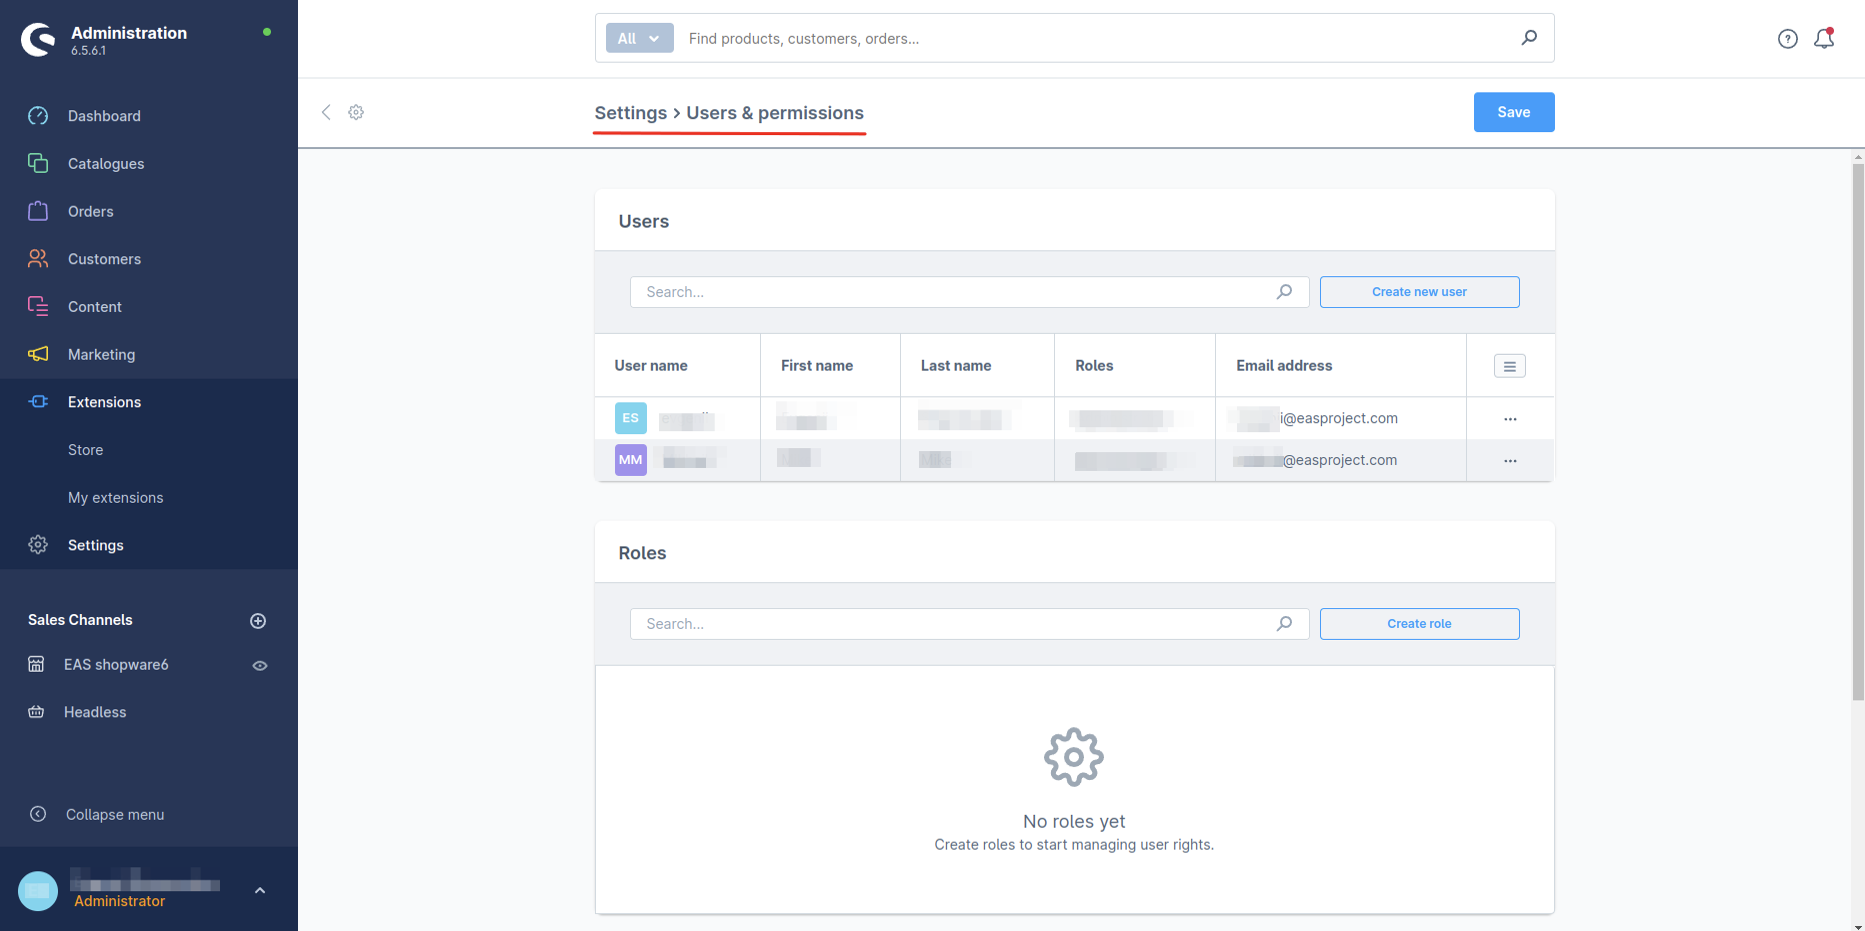
To receive timely updates for the EAS extension, you will need to provide API authorisation keys for your Shopware store to the EAS Dashboard.
Go to the settings section Settings > Users & permissions. In this section you can create new users and/or allow the EAS extension to receive updates on behalf of the existing user with administrative rights.
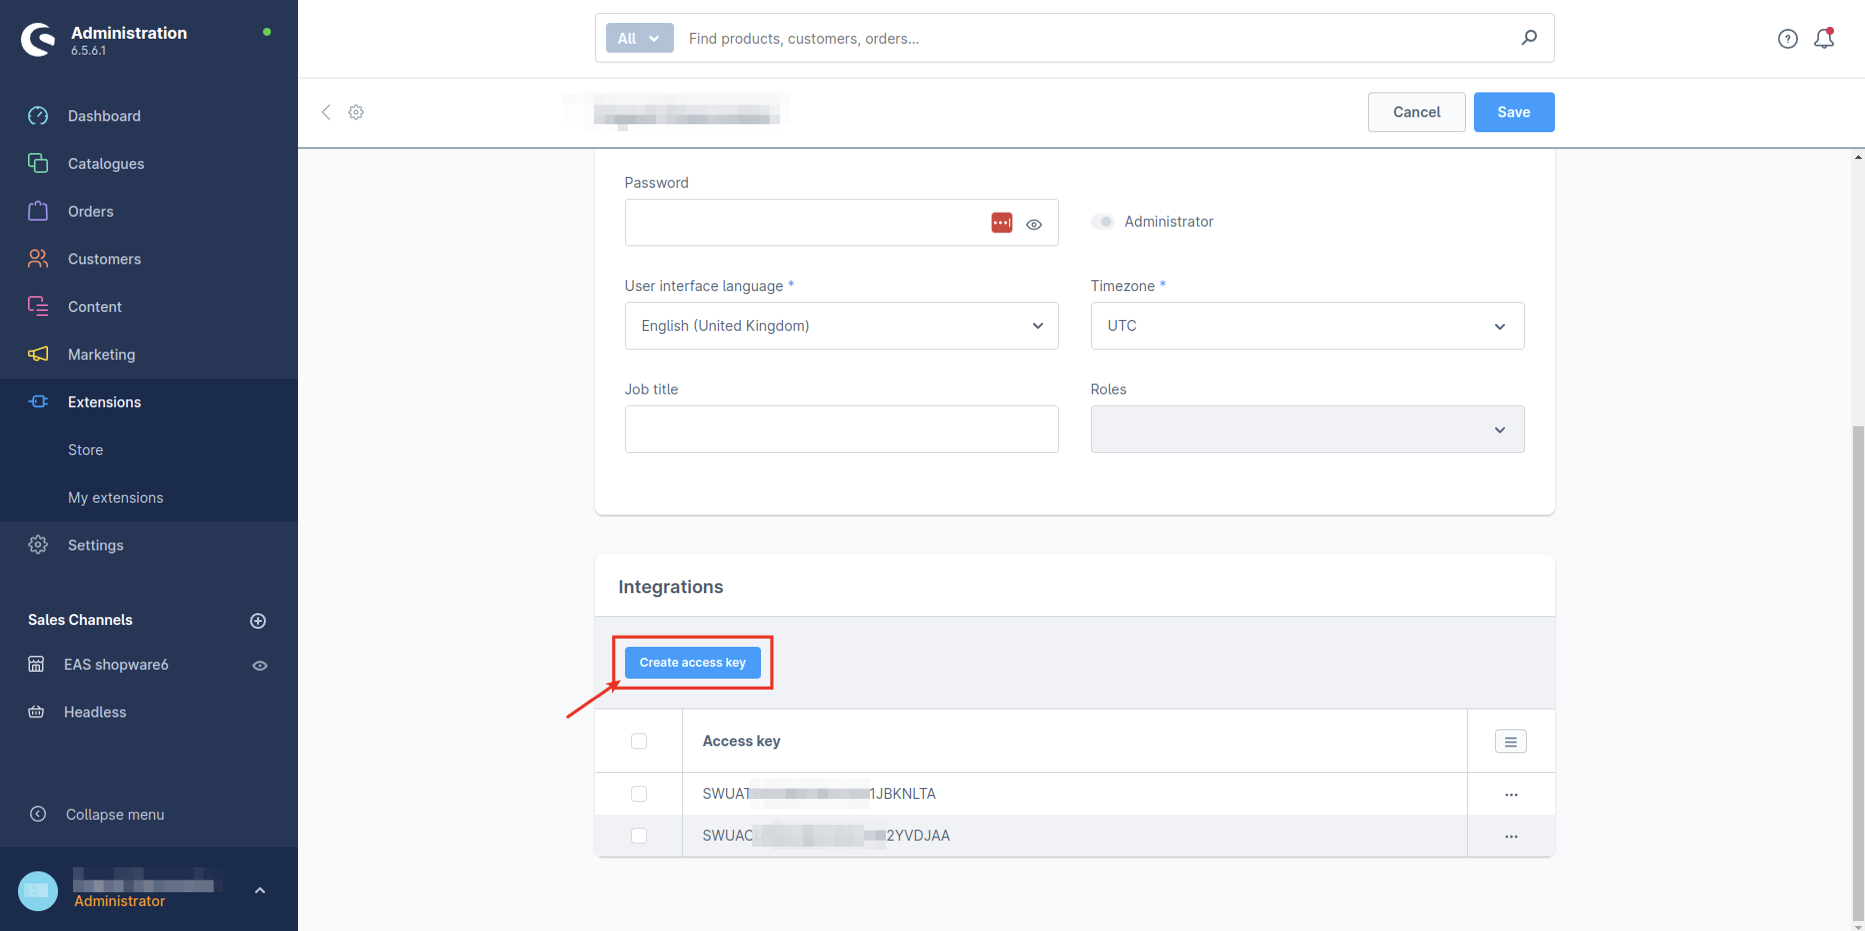
- Select the user and create API keys. Go to the user editing section. In the "Integrations" section press the "Create access key" button:

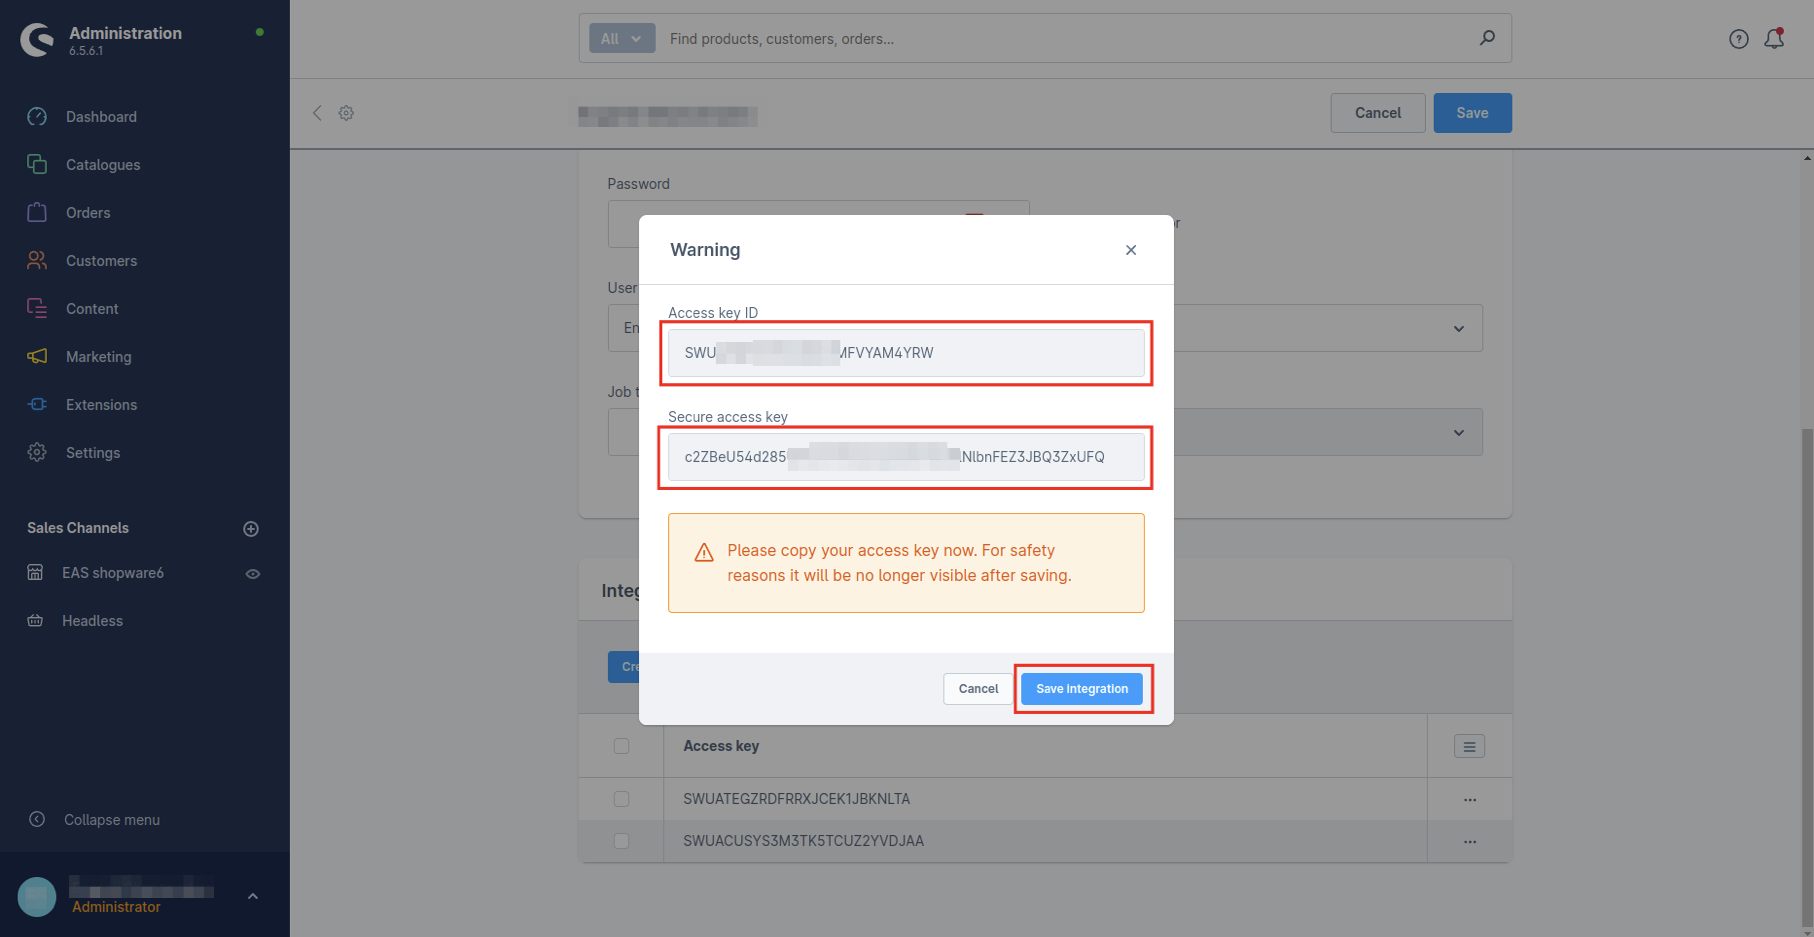
- In the new window that appears in the middle of the main view you will see a pair of keys.
- This keys will be used in the next steps, please copy the keys from the "Access key ID" and "Secure access key" fields to any text document on your computer. After you have copied the keys, click the "Save integration" button.
Note that the "Secure access key" key is displayed only once, in case you have not recorded it, repeat the creating keys step by clicking on the "Create access key" button again.
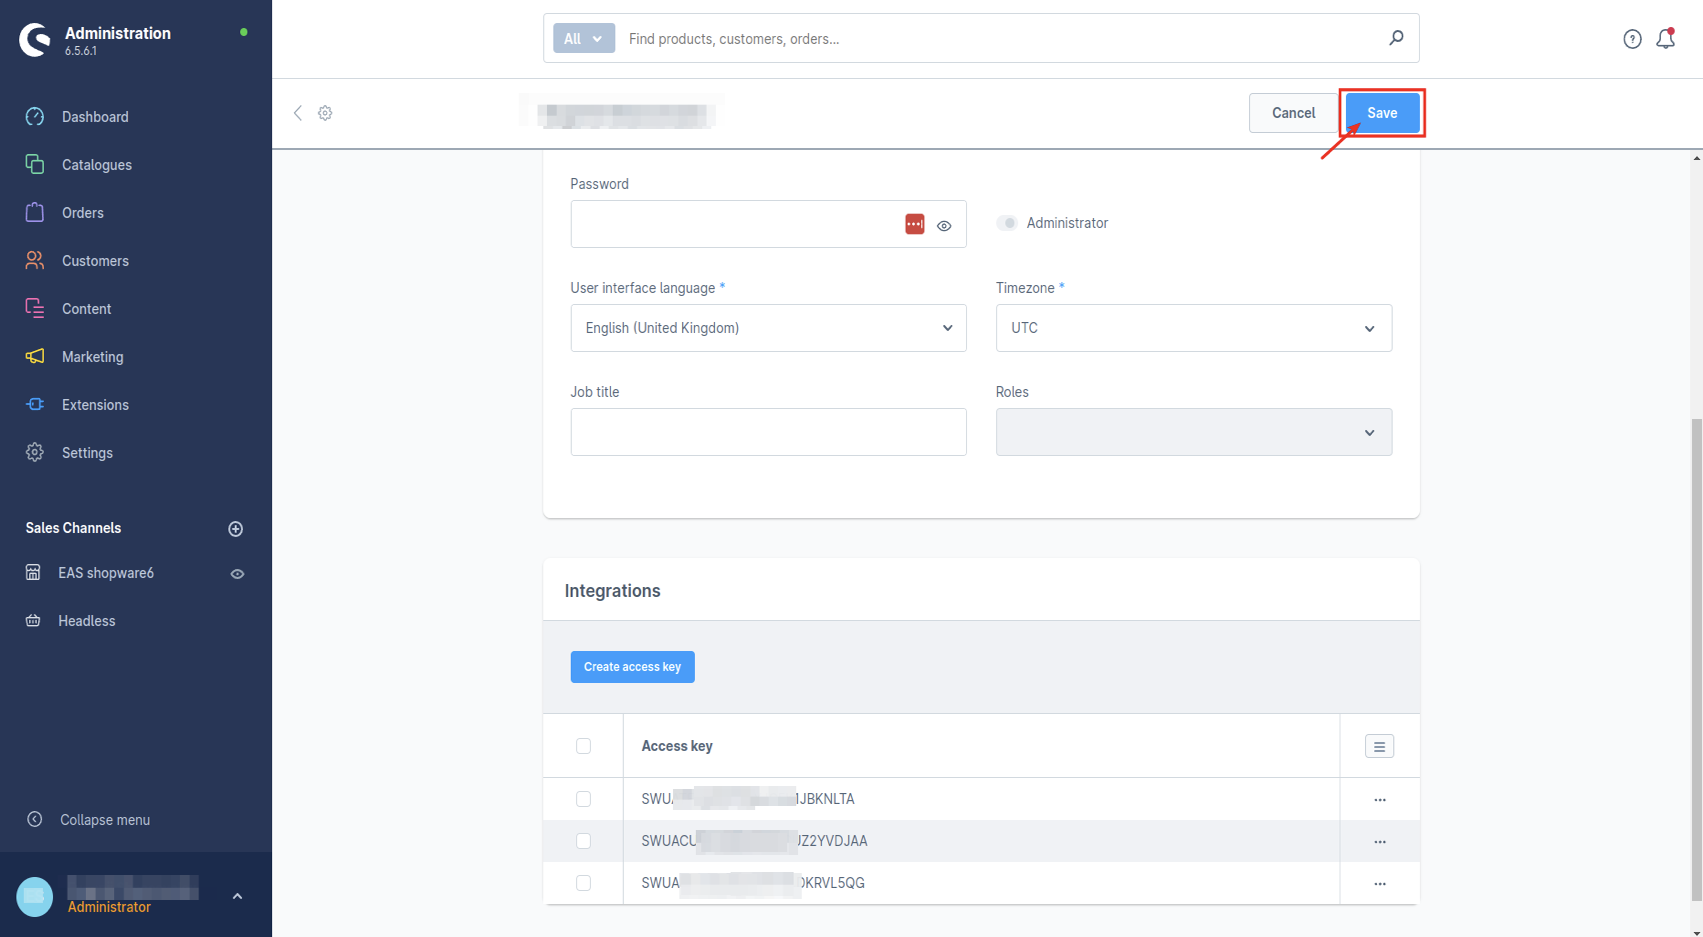
8. It is very important to confirm performed actions by pressing the "Save" button
9. Go to the section: "Catalogues" in the list of "Catalogues" you will see a new section: "Eas Settings"

10. Choose the option “EAS Settings”. Enter the previously obtained (step 3) API and Secret keys from the EAS dashboard.
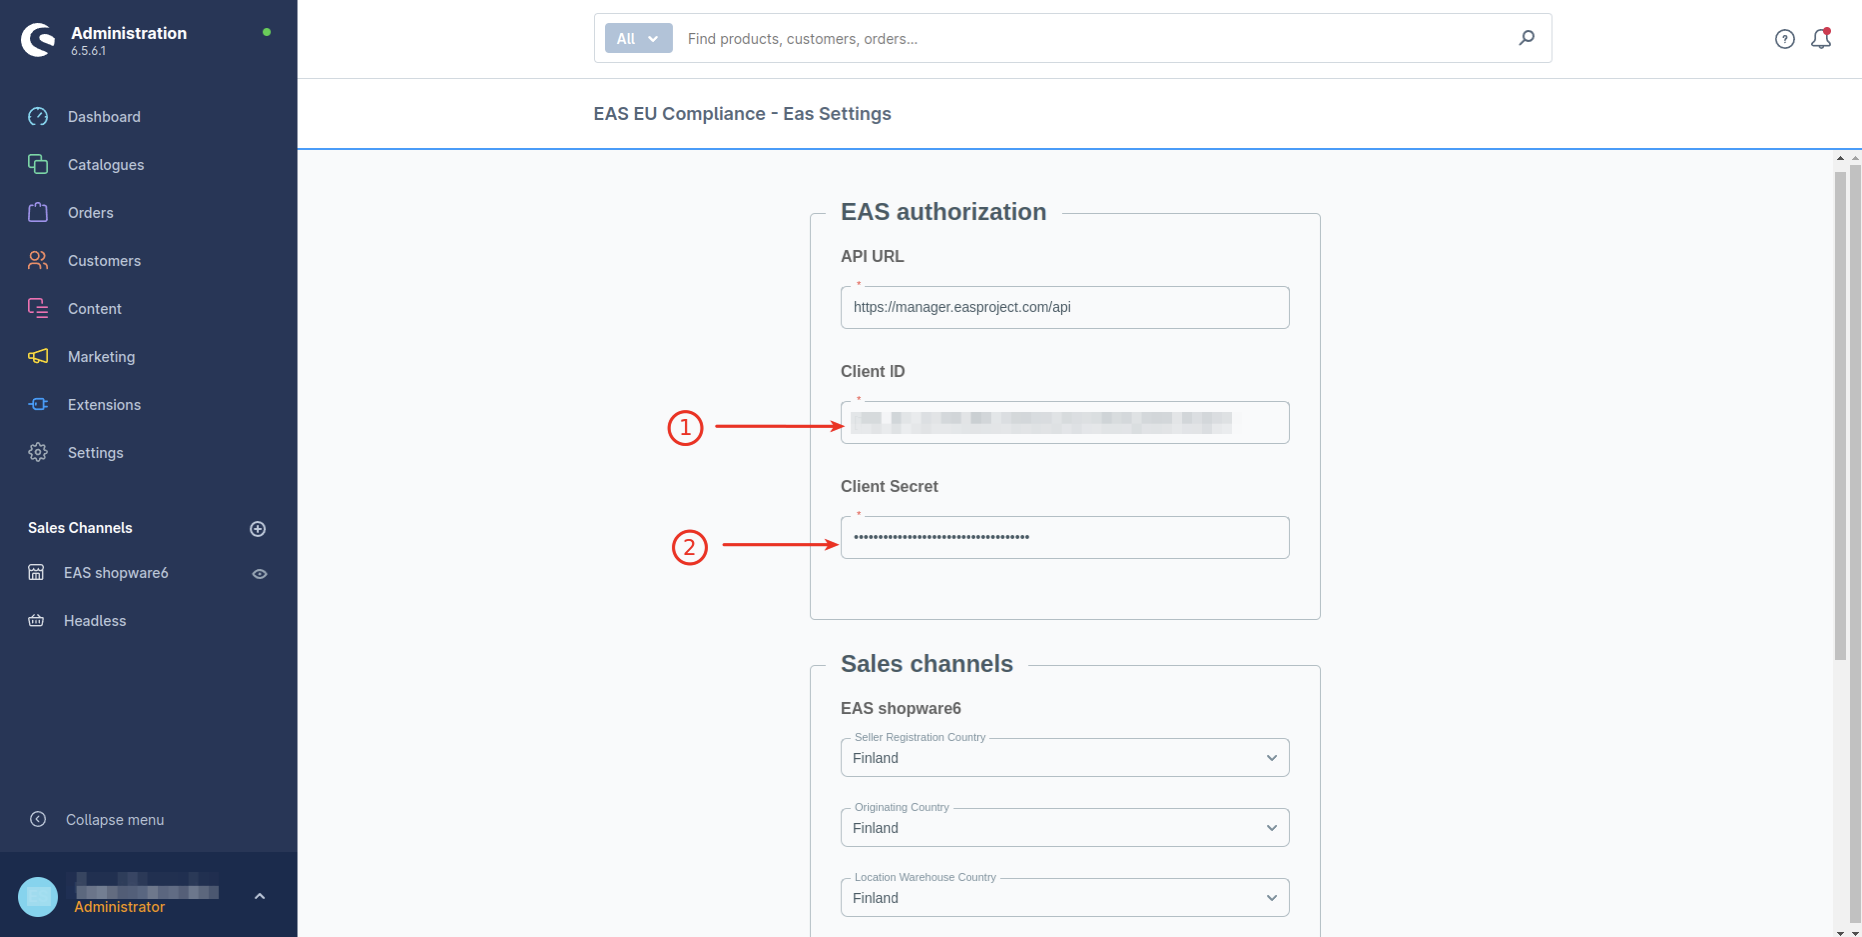
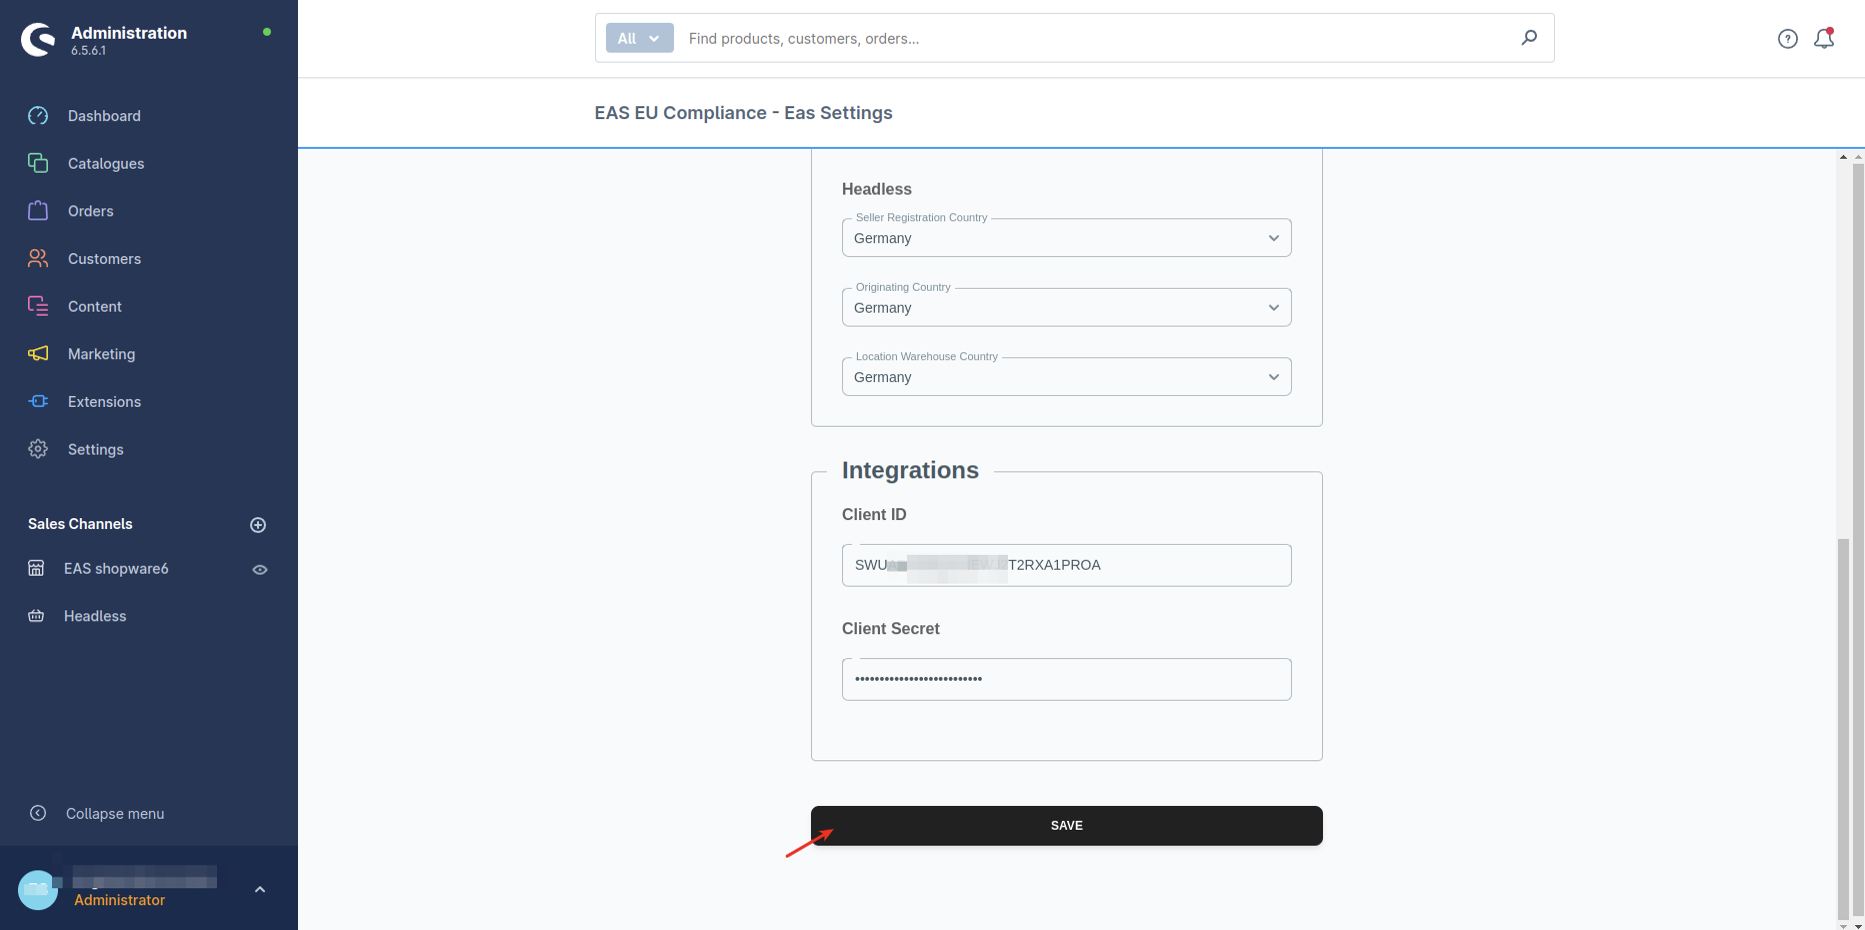
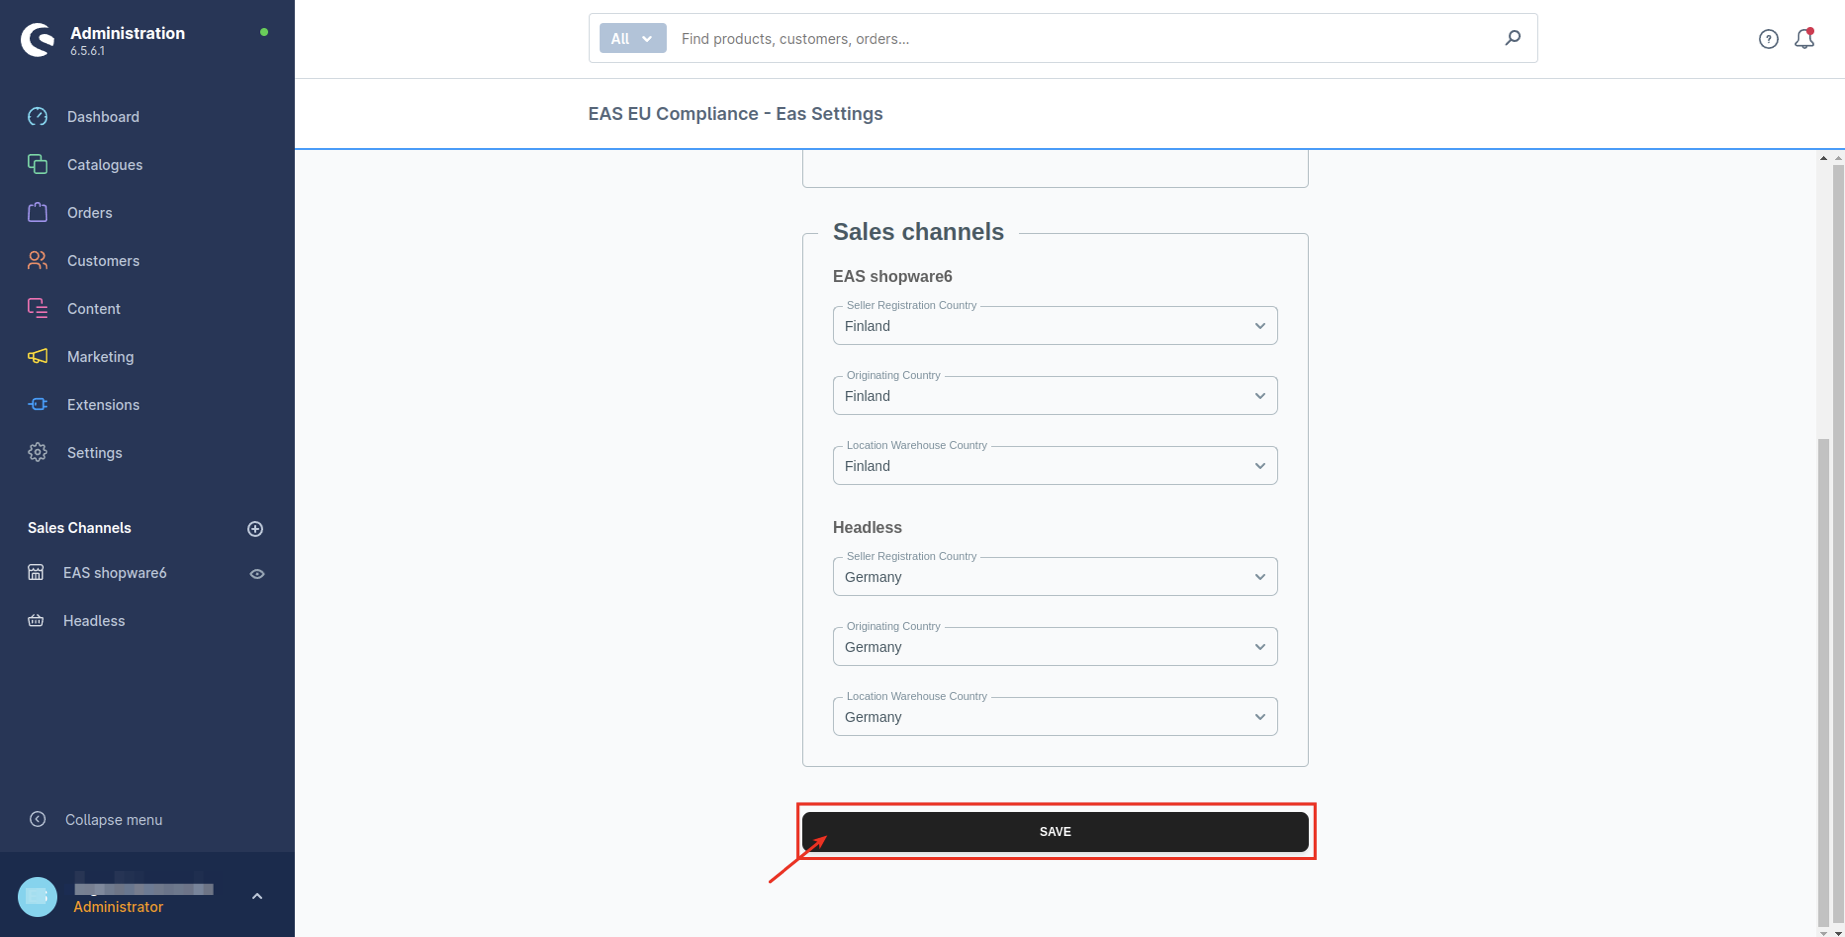
11. Enter the copied keys in the EAS EU Compliance extension settings in the "Integrations" section and click the "Save" button
12. Your store is now connected to the EAS backend and your EAS extension will be automatically updated every time we release a new version.
13. The EAS Extension is now operational
Verifying the installation
- Go to the your actual public shop, create and complete an order. The order should be made to one of the EU countries with the value under 150 EUR.
You can temporary enable delayed payment (payment by check) solution to ensure that no real monetary transaction is done. - In a few minutes, the order will be tagged to indicate that the order has been successfully transferred to the EAS system. You will also see the order in your EAS dashboard.

- Having checked the order in the EAS dashboard, please notify EAS about the need to remove the test order from the system. To do so, reach us via EAS Dashboard Chat, select Deliveries & Corrections and write your EAS Order ID, and tell us it has been a test order.
EAS tax team will remove the order from your EAS Account.


Information on setting/adjusting tax settings in your Shopware 6 store. Please, check the EAS knowledge base here.
Information on setting up HS codes for EAS DDP solution, please, check the EAS knowledge base here
If you have any additional questions, please reach us via EAS Chat.