EAS Merchandise module operation: merchandise data handling with WooCommerce
The main view of the SKU handling area has the following areas:

Figure 1
- Filtering area. SKU filtering is possible by inputting values into the filtering attribute fields.
- Search area that allows to find needed Item by Name.
- Ticking this box adds the merchandise to the list of items that are to be managed.
- Sorting button for the product Name (ascending/descending alphabetical order toggled).
- Sorting button for the Goods type (Goods/TBE).
- Sorting button for HS6+ code (ascending/descending order toggled).
- Sorting button for product price (ascending/descending order toggled).
- Special attributes toggle buttons (ascending/descending order toggled).
Any item or a group of items can have the attributes changed in the Merchandise module.
 |
As long as Merchant’s WooCommerce store and the Merchandise module stay connected (so the keys input from the WooCommerce shop are not revoked, see about keys in Figure 25 and the related description in item 2 of Section 1), any change to the product attributes that is made in the Merchandise module or in the WooCommerce shop will be parsed automatically to the WooCommerce shop or respectfully to the Merchandise module so that the SKU databases are identical. |
|
Deletion/removal of items should only be done from the WooCommerce store but not from the Merchandise module. Deleted items will automatically be deleted from the Merchandise module (page updating may be needed to change the view). |
We suggest that any bulk operations for changing product attributes are to be carried out in the Merchandise module.
Changing any of the attributes needed for EAS operation starts from choosing the list of the products for which the attributes are changed. In the following example, we chose two items for assigning specific attributes.
In the following example, we first make changes to some attributes to products in the Merchandise module and see how the changes are automatically introduced to the WooCommerce shop.
The items are “T-shirt with logo” and “Sunglasses”. This is how the items are presented in the Merchandise module:

![]()
Figure 2
And this is the items view in the WooCommerce (with attributes):
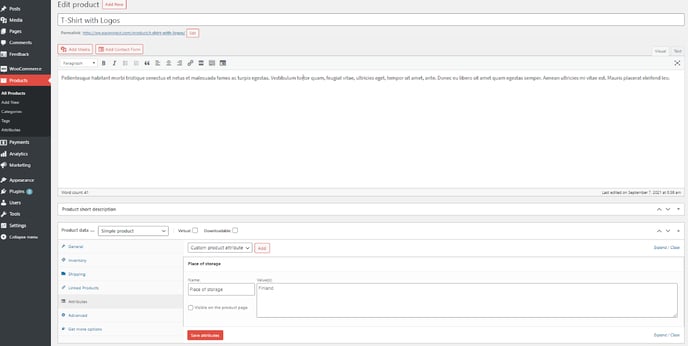
Figure 3
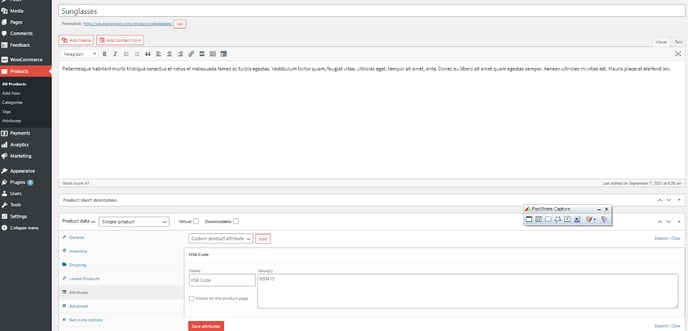
Figure 4
As a next step we mark the items for handling in the Merchandise module:
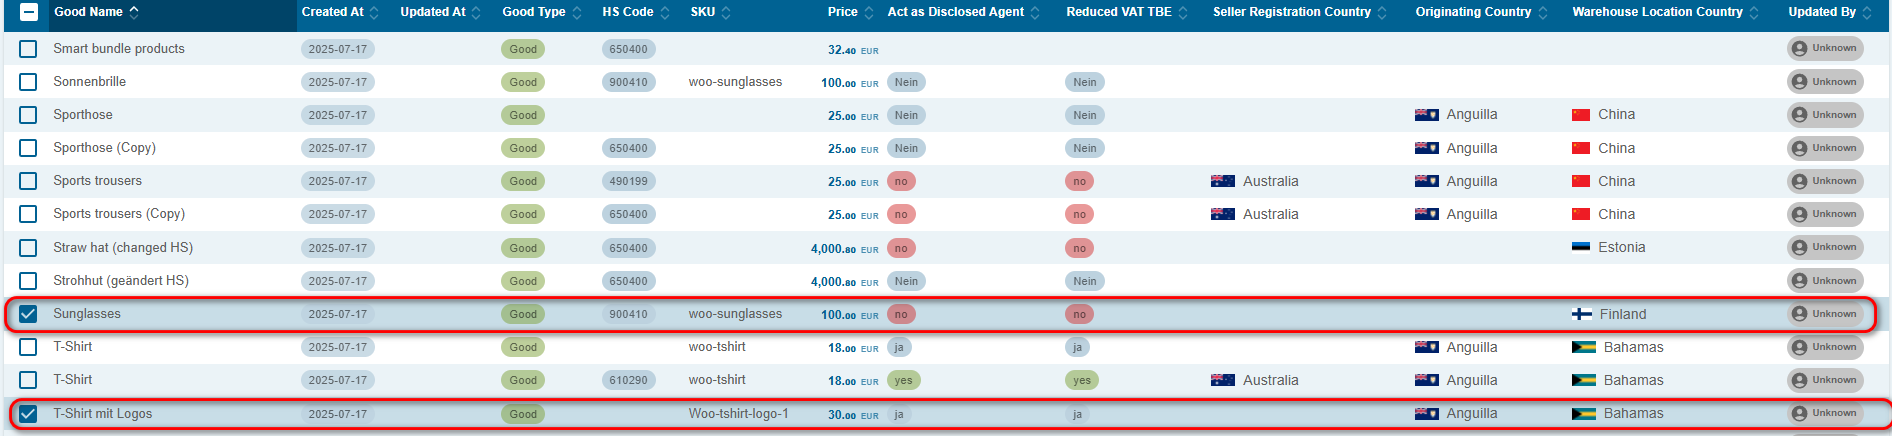
Figure 5
And press “Edit Selected Goods” at the upper right corner of the page, the attribute change menu appears:

From the foldout menu, one can choose to bulk assign values to the chosen items.
HS code can be chosen here manually, for automatic assigning of HS6 codes see below.
Seller registration country is assigned to “Belgium” and “Act as disclosed agent” to “Yes” (see Figure 6 below).

Figure 6
Saving changes is confirmed by pressing the “Save” button.
Results could be immediately seen in the Merchandise module with applied changes:
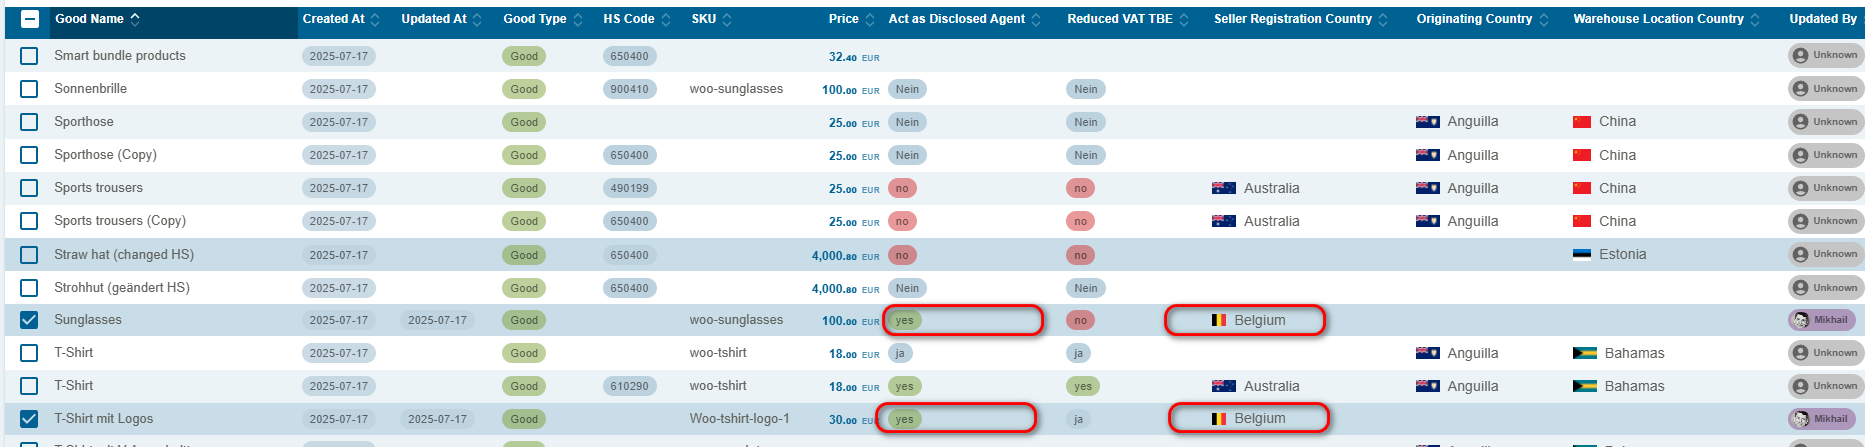
Figure 7
Changes automatically parsed to the WooCommerce store.
See the updated attributes for the “T-shirt with Logos” and for “Sunglasses”.
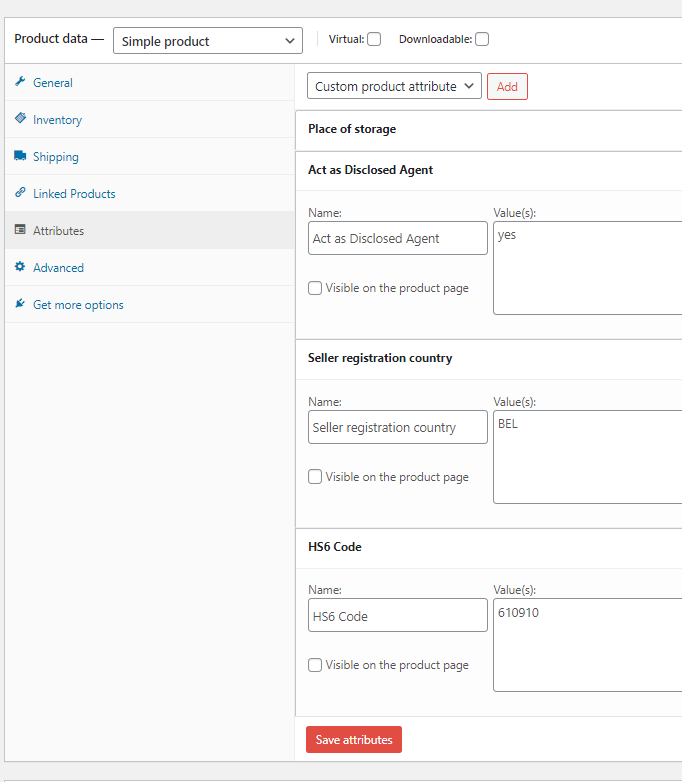
Figure 10
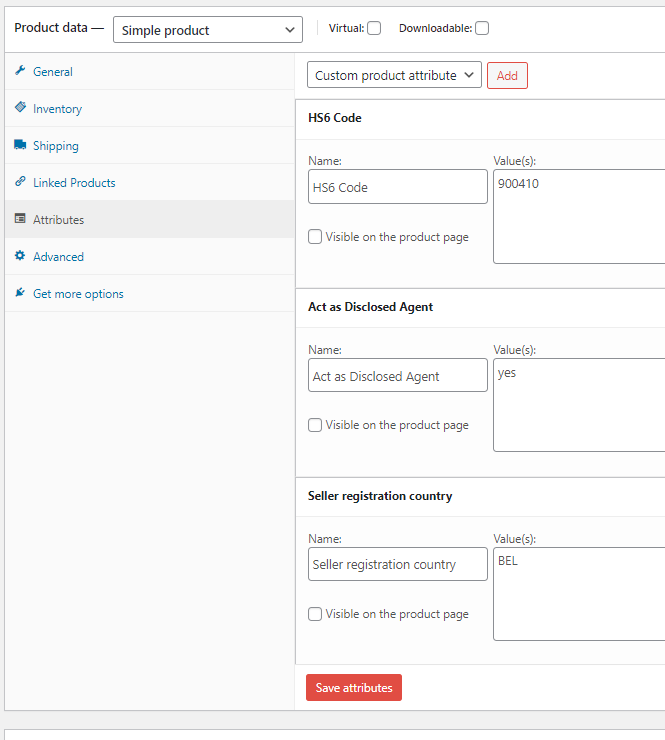
Figure 11
In the same way, any changes introduced to the product attributes in the WooCommerce store will end up in the Merchandise module.
|
Parsing data from the Merchandise module to the WooCommerce store and back may require some time. Update the page in the Merchandise module to see the changes to attributes. |
|
For unimpeded and functional use of the EAS system, it is suggested that ALL special attributes are populated for all Merchants’ SKUs and no special attributes are left unpopulated. EAS system uses internal logic to assign values to blank attribute fields, but the automatic population of the attributes may lead to mistakes in VAT scheme assigning. |
For example, If the Merchant never acts as Electronic Interface, the “Act as a disclosed agent” attribute should be manually populated as “No” for all SKUs.