EAS Merchandise module is used for handling of product data in bulk, including HS codes
EAS Merchandise module is used for:
-
Initial mapping of special merchandise attributes;
-
Bulk assignment of special attributes values;
-
Receiving valid HS6+ codes, needed for the system operation;
-
Automatic update of attributes values for SKUs;
EAS Merchandise module is available to the Merchant as soon as the registration is complete and the WooCommerce plugin is installed and configured. The Merchandise module can be used for multiple merchant stores and multiple platforms (WooCommerce, Magento, Shopify). If merchant has multiple stores connected to the EAS system, all SKU data can be parsed into the same Merchandise module for enrichment and handling.
Please refer to platform-specific EAS manuals for using the Merchandise module with other selling platforms.
To connect to the EAS Merchandise module, follow these steps:
1. Go to WooCommerce → Settings → Advanced → REST API menu.
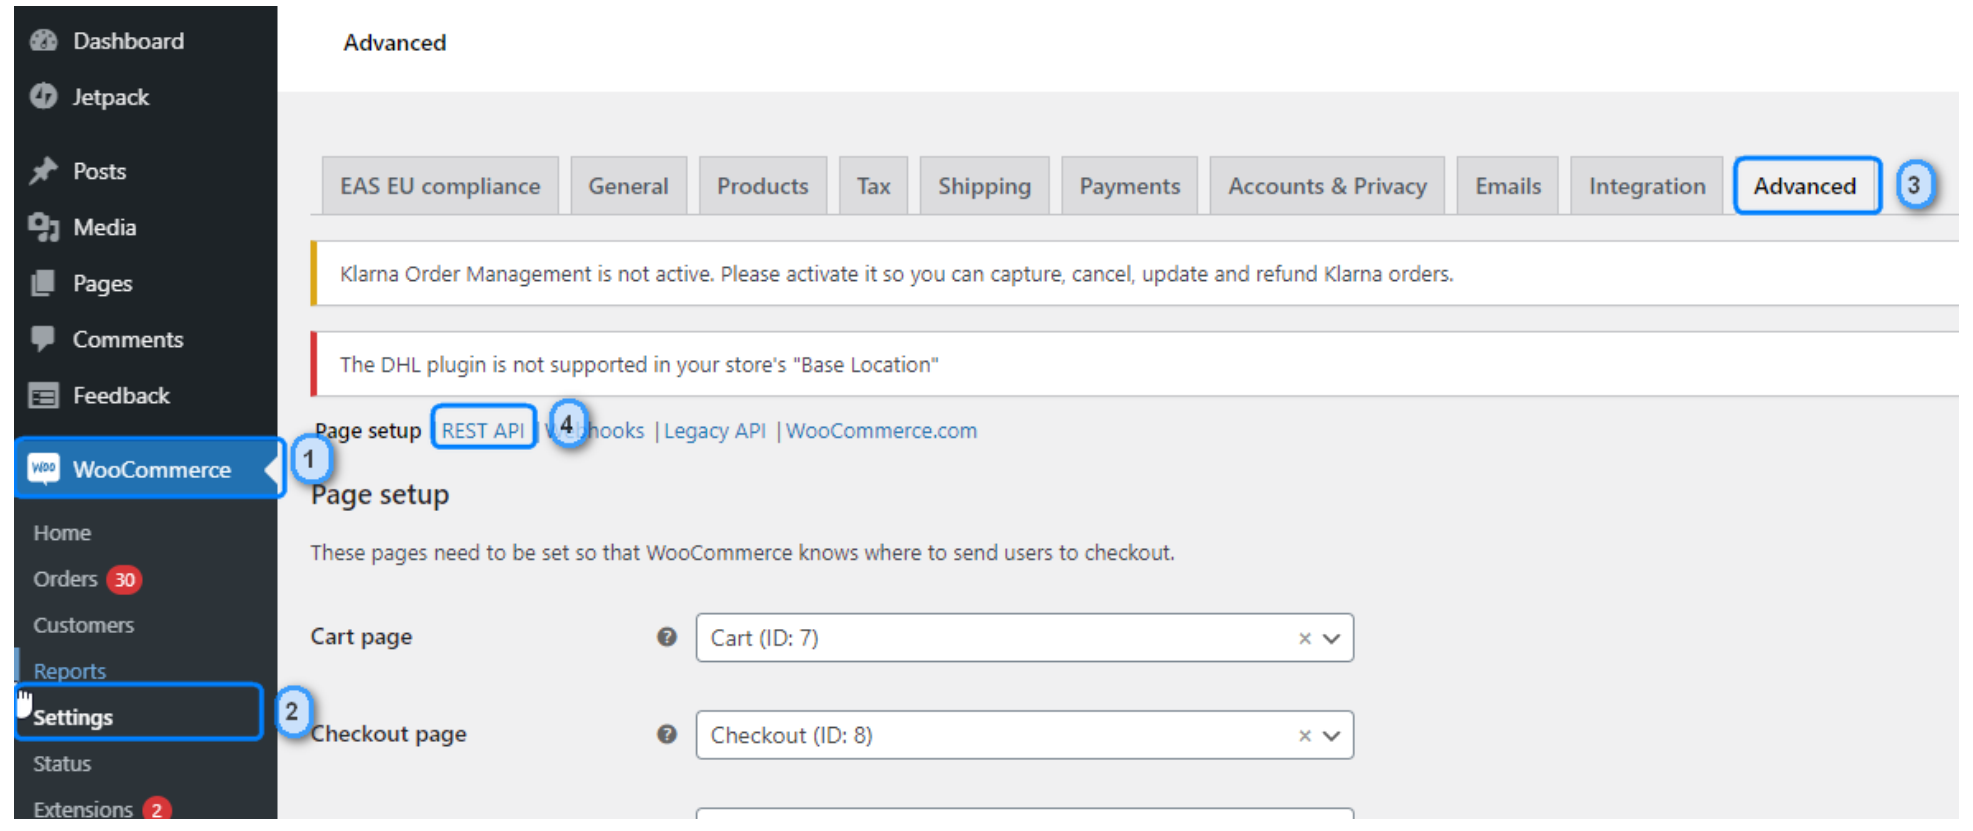
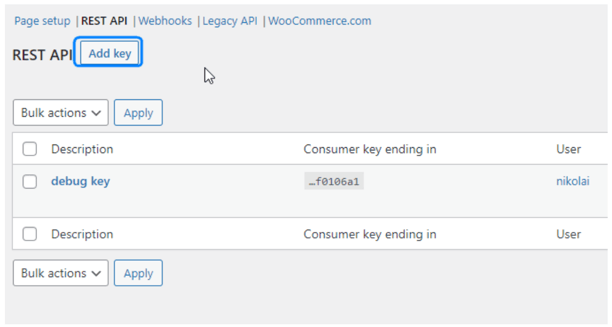
2. Press “Add key”.
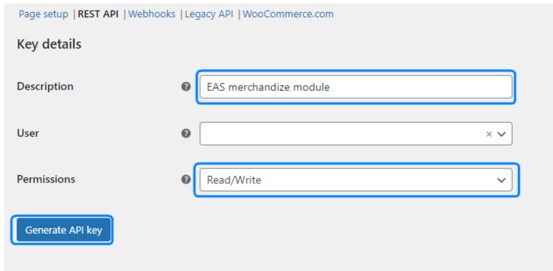
3. In opened window fill Description with any name, set permissions to → Read/write. User field will be filled automatically by the system, leave it as is.
4. Press “Generate API key”
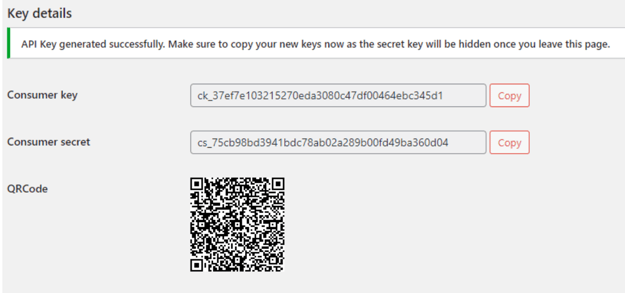
5. A window with key details will appear. Leave it open.
6. Go to https://mpm.easproject.com/
7. Authenticate using your login and password to the EAS Dashboard. The merchant login name is the contact e-mail given at registration.

8. In the new window press button “Add shop”.
![]()
9. The Merchandise module then requests that a connection to the store would be established. API keys generated as shown below shall be used for the connection.
The merchant's chosen name of the store is to be entered into the field (1). Please note, that the Merchandise module can be used for multiple stores simultaneously, for example, in the case when the Merchant has multiple WooCommerce. Full URL (including the suffix, like this: https://www.example123store.com) of the electronic store shall be input into the field (2). Customer key and customer secret key shall be copy-pasted into the fields (3) and (4) respectfully.
10. Fill all fields and press the button “Save”. See below the example of the filled form.

After a successful connection to the Merchant’s E-store, the mapping process is initiated, a new window is opened (see below).
11. Match fields of the EAS Merchandise module with the existing merchandise fields in your WooCommerce store. Press the “Save button” at the end of the process..
The list in the form contains all EAS system mandatory fields needed for EAS system operation.

Fold-out menus contain the list of all attributes available in the Merchant store including attributes created during the installation of the Plugin (EAS system merchandise attributes) and attributes that existed in the e-store before the Plugin installation.
The mapping process aims to map the EAS system required fields defined earlier in the Plugin setting to the Merchandise module for bulk processing and HS6 code retrieval.
Please, note that fields that are visible in the above figure are named the same way as defined in Section 4.4 of Quick Installation guide, i.e., they are EAS system attribute names.
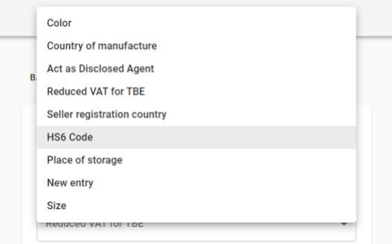
Pressing on the attribute fields renders a fold-out menu representing all merchandise attributes available in the WooCommerce store. An E-shop attribute should be chosen out of the fold-out menu to be assigned to the EAS special attribute.
Every field should be mapped in the same way.
Figure below shows the mapping results. Attributes mapping done in the Plugin settings is reproduced here (on the right) against the resulting attributes mapping in the Merchandise module (on the left). Please, notice that both in the Merchandise module and in the Plugin setting the mapping is identical.
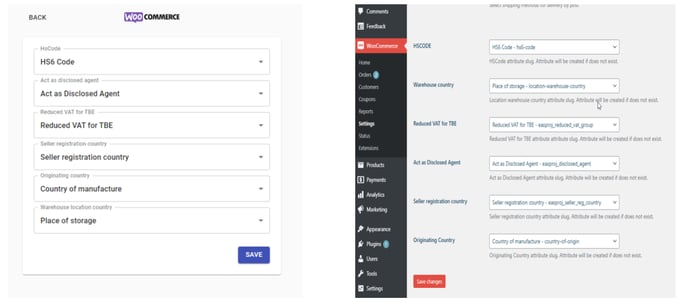
If mapping was done incorrectly, you can remap fields in the Merchandise module before the button “Save” is clicked.
After the “Save” button is clicked the next view area is produced (see Figure below).
13. Press the “Start Parsing” button to parse SKU data from the shop into the Merchandise module. Parsing may take some time, depending on the number of SKUs in the Merchant store.

Status will be changed to "ProductsMigrationStarted"
![]()
Wait for the process to finish. When process ends, status will be changed to "ProductsMigrated"
![]()
Click on the row to see the list of the products.
14. New screen with the merchandise view will be opened, as shown below.
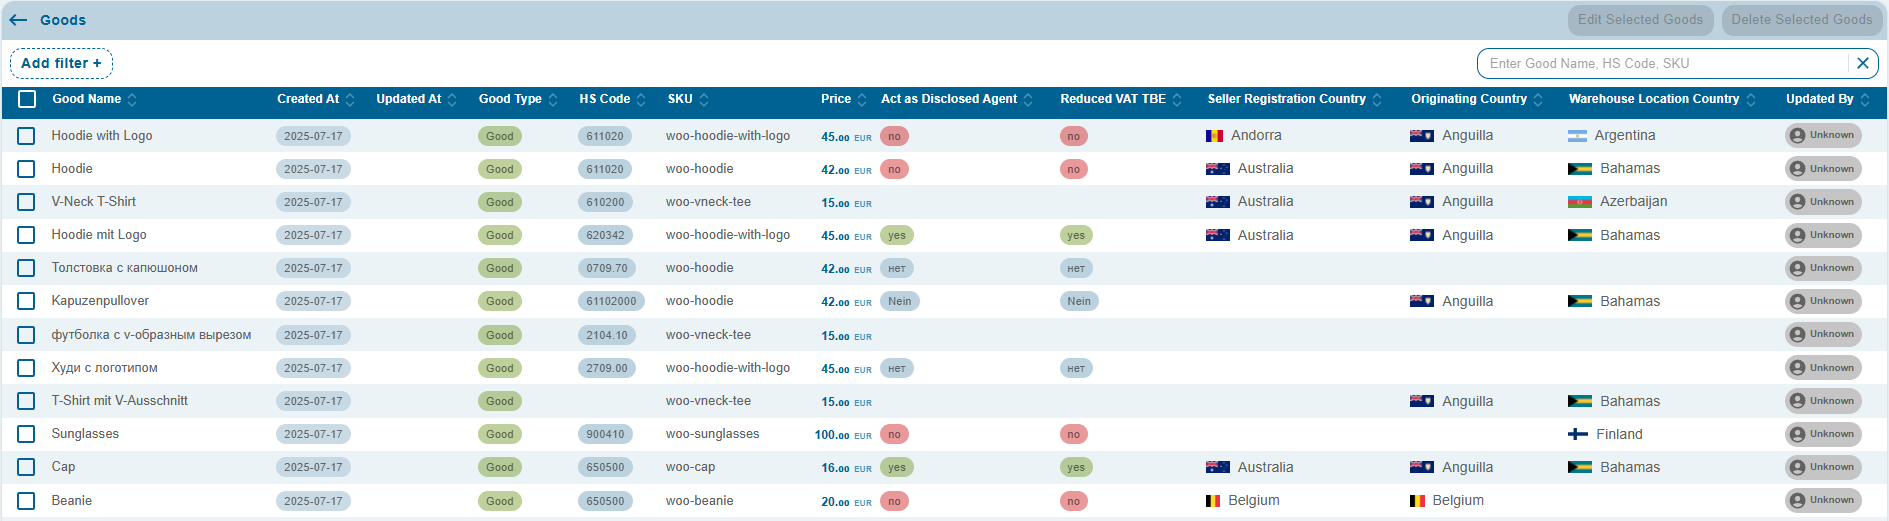
Right-left scrolling of the main view is possible to reveal more attributes.
Make sure that attributes are mapped properly. If any of the attributes are mapped wrongly, you can return to the previous screen (Figure below) by choosing the menu item “Shops” in the left upper corner of the page.

|
Thus, the action will return you to the shop's view Figure above and by pressing the icon next to the “View goods” one can remove the parsed SKU database from the Merchandise module. |
Make sure that you only delete the SKU database that relates to the current wrongly parsed E-shop. This action don't influence product's data on your store, it will be left as is. If the Merchant has multiple stores with previously parsed databases, they will be visible in this view (with sales platform notification and separate names given by the Merchant during the parsing process)
15. Repeat actions starting from item 7 above to parse the SKU database into the Merchandise module again.
For more information, contact us at support@easproject.com